Hello, fam!
Welcome back again to VideoTranslator support where we will be telling you the tips and tricks regarding the media and translation world.
This time, we will be explaining how you can import and edit SRT files to Adobe Premiere Pro.
Before we begin, let’s explain what an SRT file is first…
What Is SRT?
SRT is a plain-text file that contains critical information regarding subtitles, including the start and end timecodes of your text to ensure your subtitles match your audio, and the sequential number of subtitles.
By having an SRT, your video will have subtitles or captions. Having subtitles or captions on your video will be very helpful for many people, especially the ones with hearing impairments.
How To Create An SRT File?
Generally, you can create an SRT file in any text editor or by using SRT software.
Using Text Editor To Create An SRT File
To create an SRT file by using a text editor, you have to follow the below steps:
- Open any text editor, such as TextEdit or Notepad.
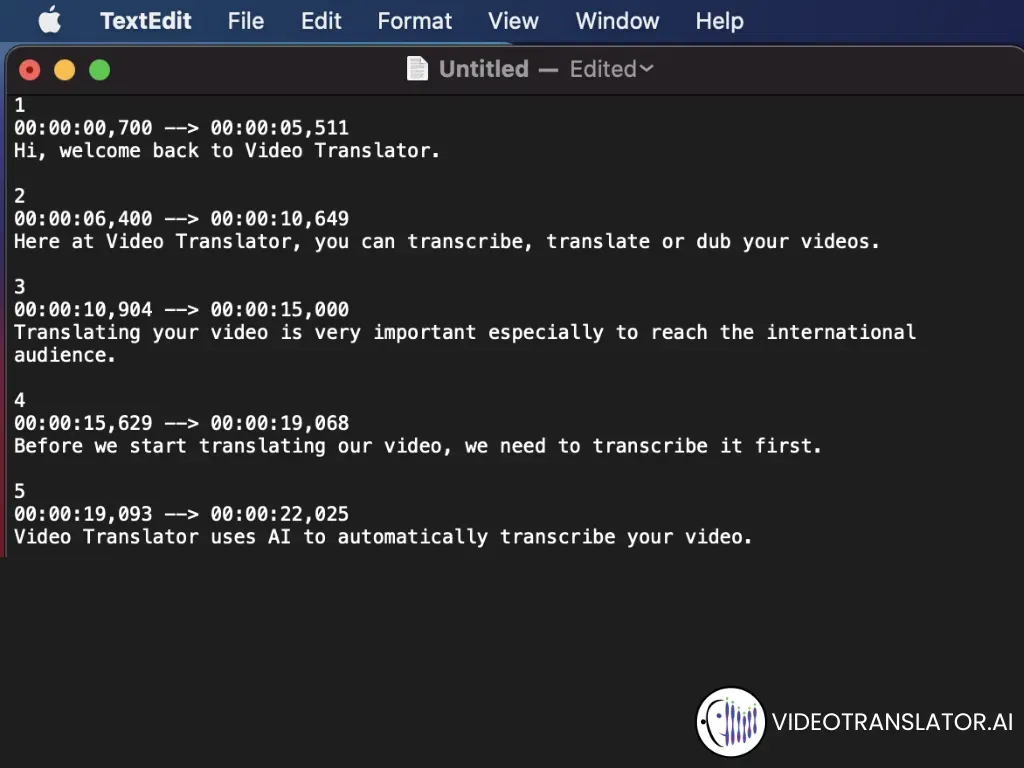
- Order your caption lines with a number beginning from 1.
- Click enter and put your timestamp. The format of the timestamp will be ‘hours:minutes:seconds,milliseconds –> hours:minutes:seconds,milliseconds’.
- Click enter again and start writing your caption.
Do make sure that you do not mess up the timestamp format.
Saving An SRT File From TextEdit on Mac
Open TextEdit on your Mac.
- Order your caption lines with a number beginning from 1.
- Click enter and put your timestamp. The format of the timestamp will be ‘hours:minutes:seconds,milliseconds –> hours:minutes:seconds,milliseconds’.
- Click enter again and start writing your caption.
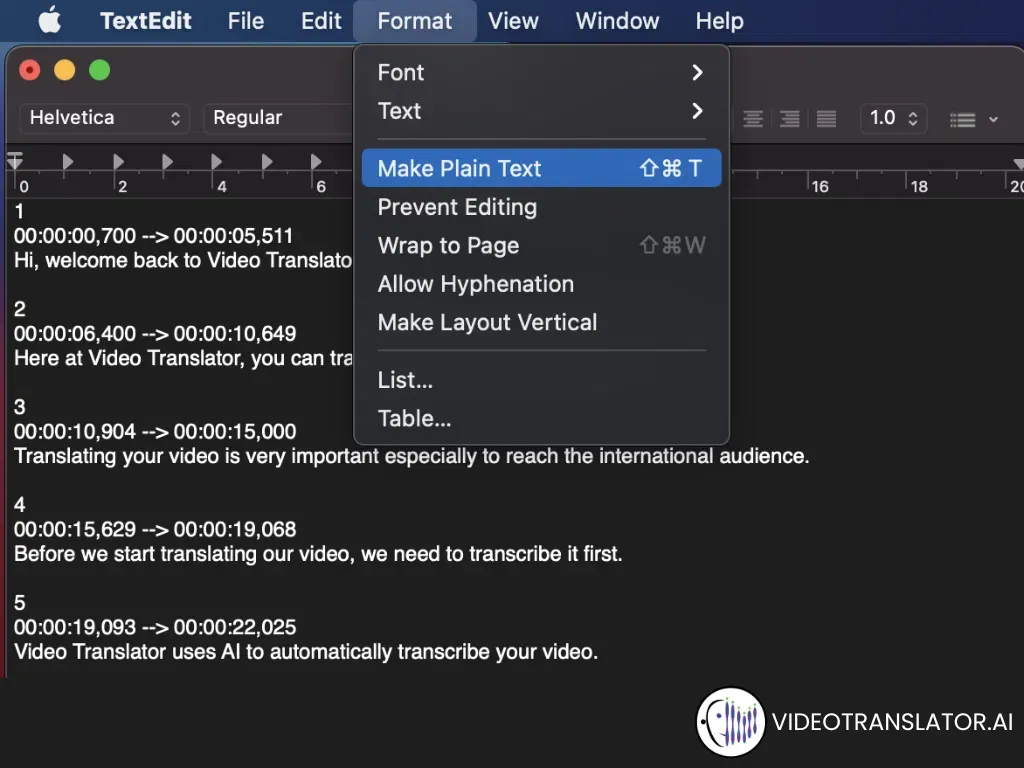
- Go to Format and click on ‘Make Plain Text’.
- Go to File and click save.
- In the Save As text field, type down your file name. TextEdit will automatically put the file extension to .txt so you want to change it to .srt.
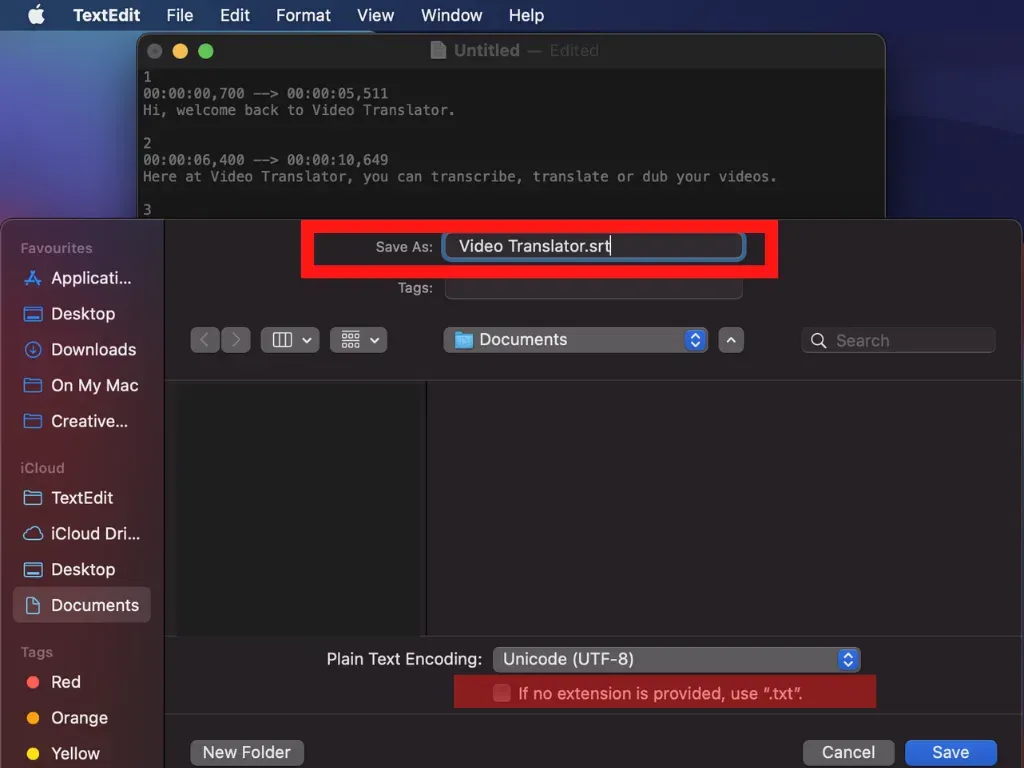
- Uncheck the ‘If no extension is provided, use .txt’ box and click save.
How To Import SRT File To Adobe Premiere Pro
Now that you know how to create an SRT file, you are good to import your file to Adobe Premiere Pro.
Here is how you can import an SRT file in Adobe Premiere Pro:
- Open your project in Adobe Premiere Pro. The Adobe Premiere Pro we use is the 2020 version.
- Import the subtitle by clicking File > Import and find your subtitle file then click import.
Alternatively, you can drag your subtitle file to your timeline.
How To Edit Subtitle In Adobe Premiere Pro
There are two ways for you to edit your subtitle in Adobe Premiere Pro.
The First Way To Edit Subtitle In Adobe Premiere Pro
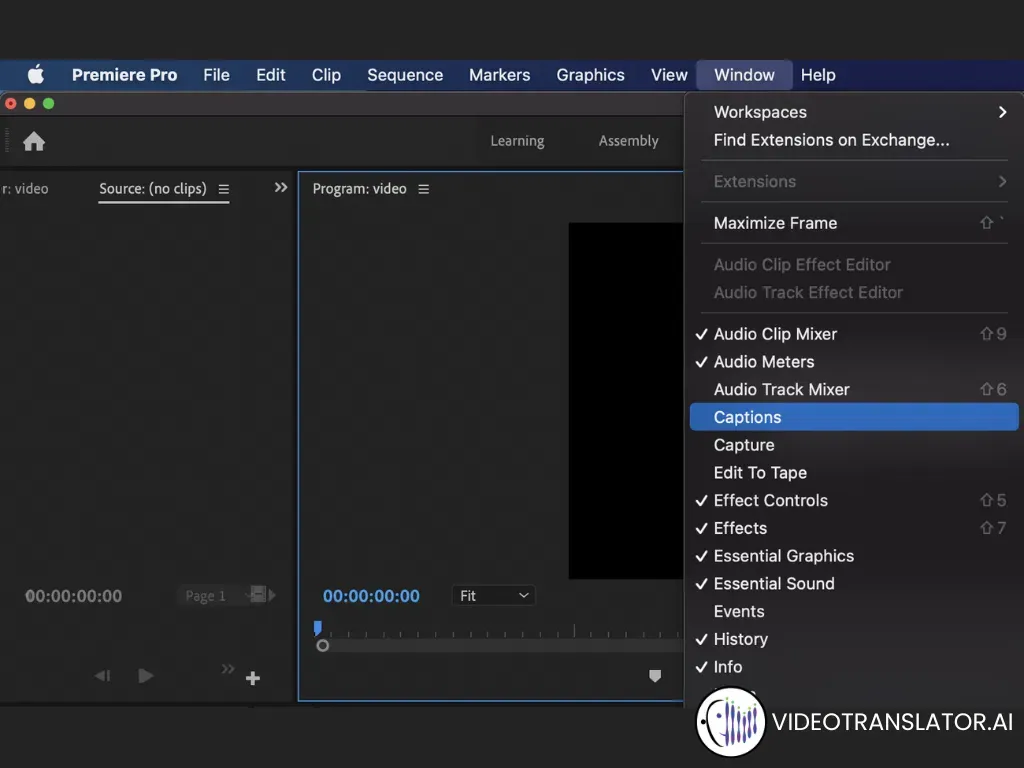
- Go to Window > Caption.
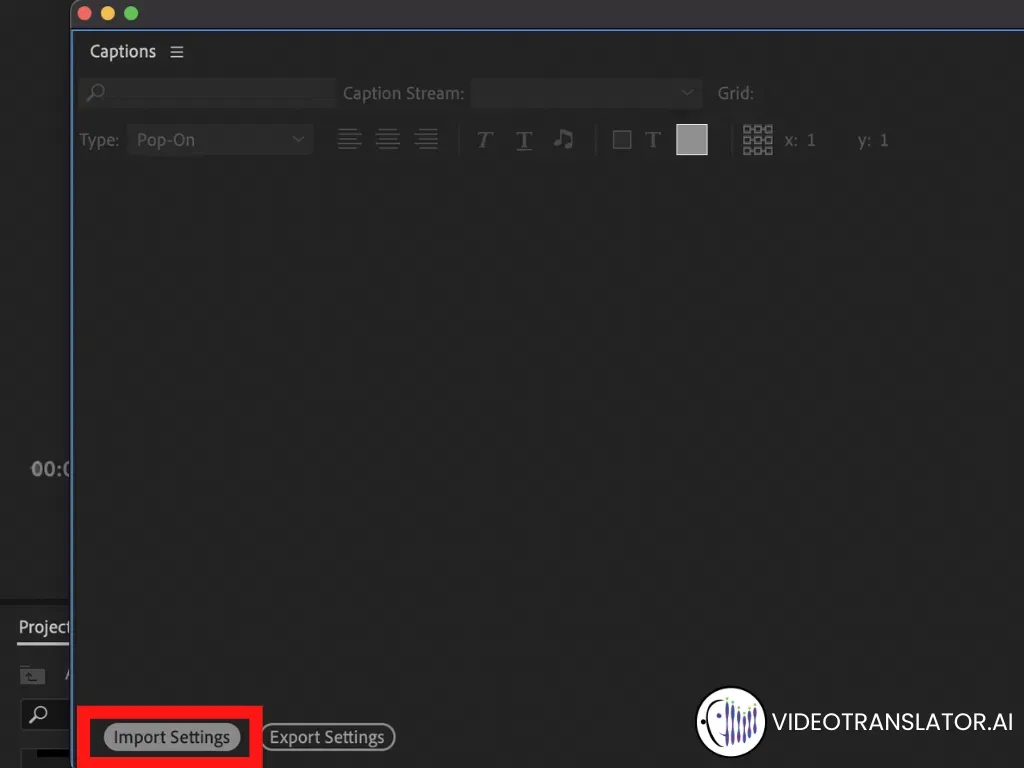
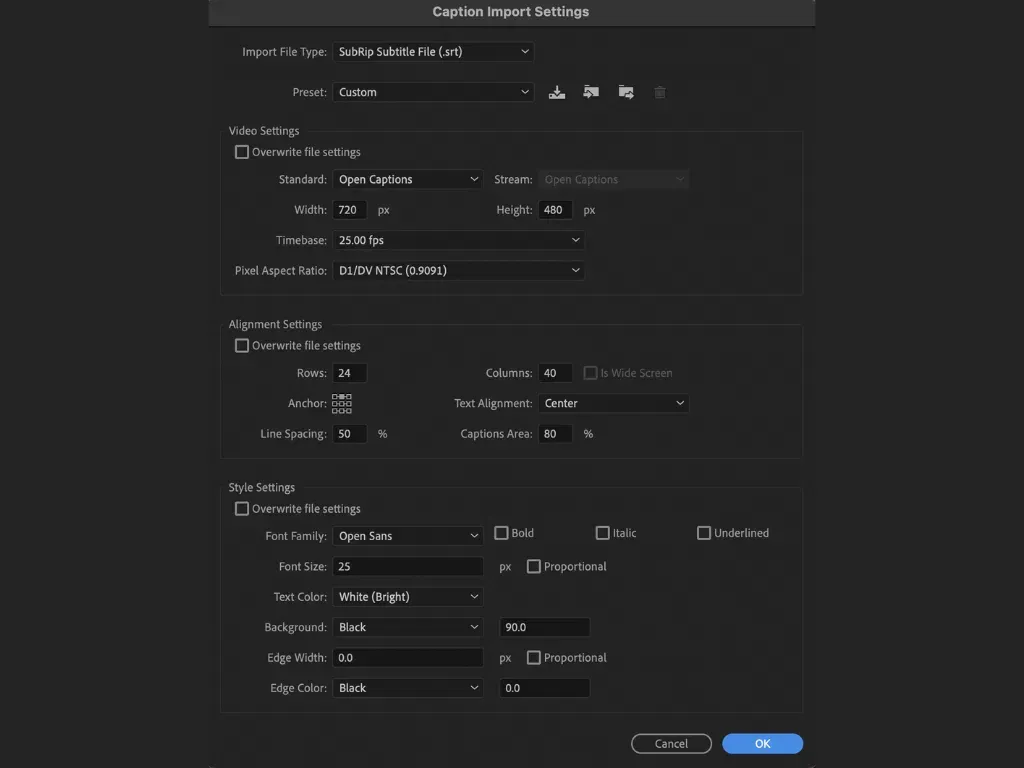
- Click import settings. Here, you can preset the settings of your subtitles, such as font style, font size, and subtitle location.
- By doing this method, all of your subtitle settings will be unified.
The Second Way To Edit Subtitle In Adobe Premiere Pro
- Make sure that your SRT file is already available on your timeline.
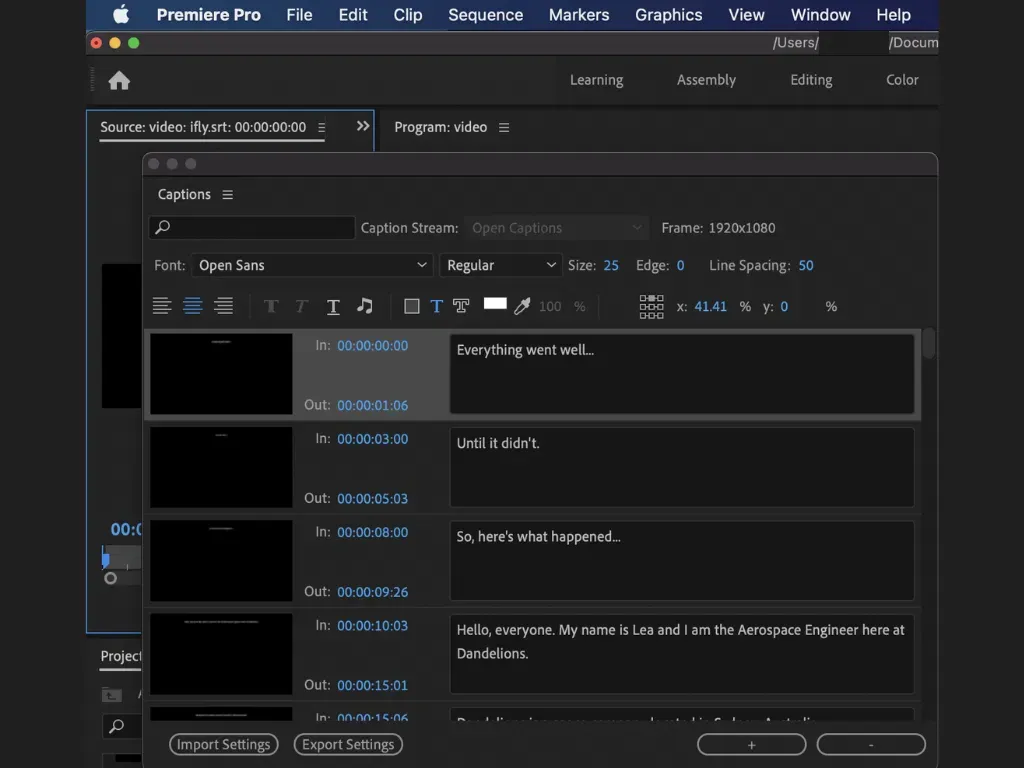
- Double click on your subtitle file.
- The captions window will open. Here, you can individually edit each subtitle.
This method is good if you just want to edit some parts of your subtitle.
What Do I Do If My SRT File Does Not Show In Adobe Premiere Pro?
If you can’t see you SRT file in Adobe Premiere Pro, you may want to try the following:
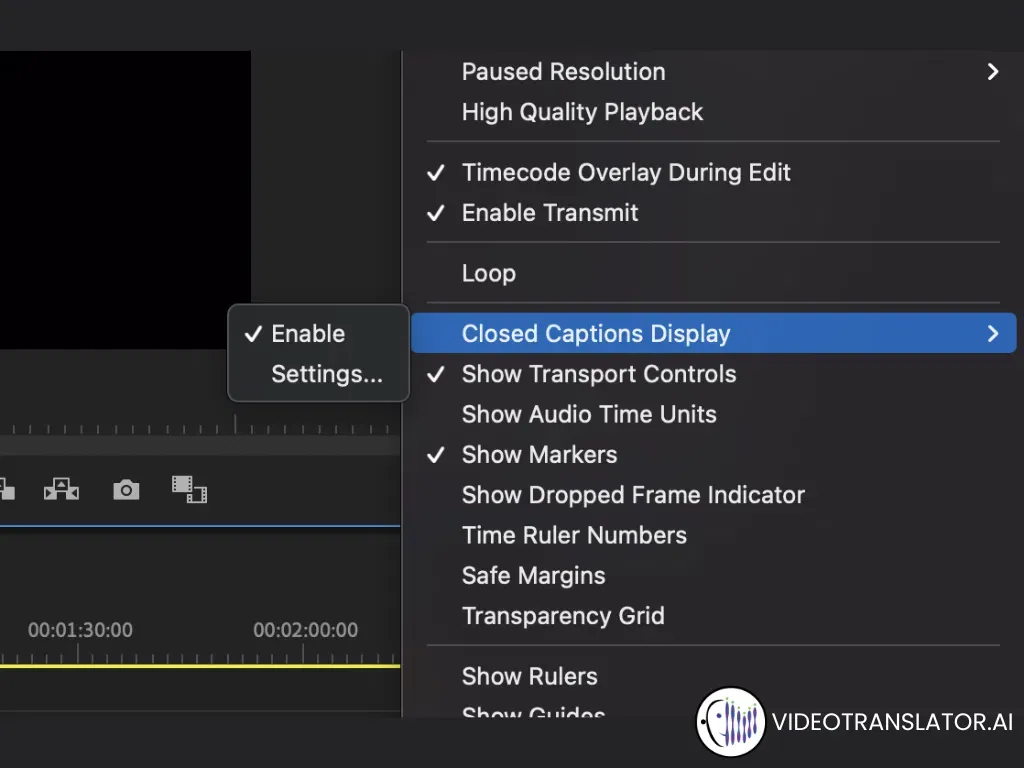
- Click on the wrench icon on your timeline.
![]()
- Go to Closed Captions Display and make sure that it is enabled.
Exporting Video With Subtitle In Adobe Premiere Pro
To export a video with subtitle in Adobe Premiere Pro, you can do the following:
- Click File > Export. Alternatively, you can type command + M.
- Select your export setting format and preset.
- Click export.
Your video will automatically have baked-in subtitle.
Conclusion
In this article, we have talked about what an SRT is, different ways to create an SRT file, how to import and edit SRT file to Adobe Premiere Pro and how to export video with subtitle in Adobe Premiere Pro.
For more information regarding VideoTranslator, do not hesitate to contact us at hello@videotranslator.ai.
See you next time for more educational blog posts!
